Hey there,
It’s Robin from CFD Engine & I’m recovering from my epic battle with snappyHexMesh by taking a break in ParaView-land.
ParaView is one of those tools that rewards time spent playing with it – clicking all the buttons & poking around to see what happens. You’re very unlikely to break anything & extremely likely to learn something.
So, at the risk of all of my emails turning into “three tip” collections, here are three bits of ParaView esoterica that you can play with today.
Slice Along Polyline
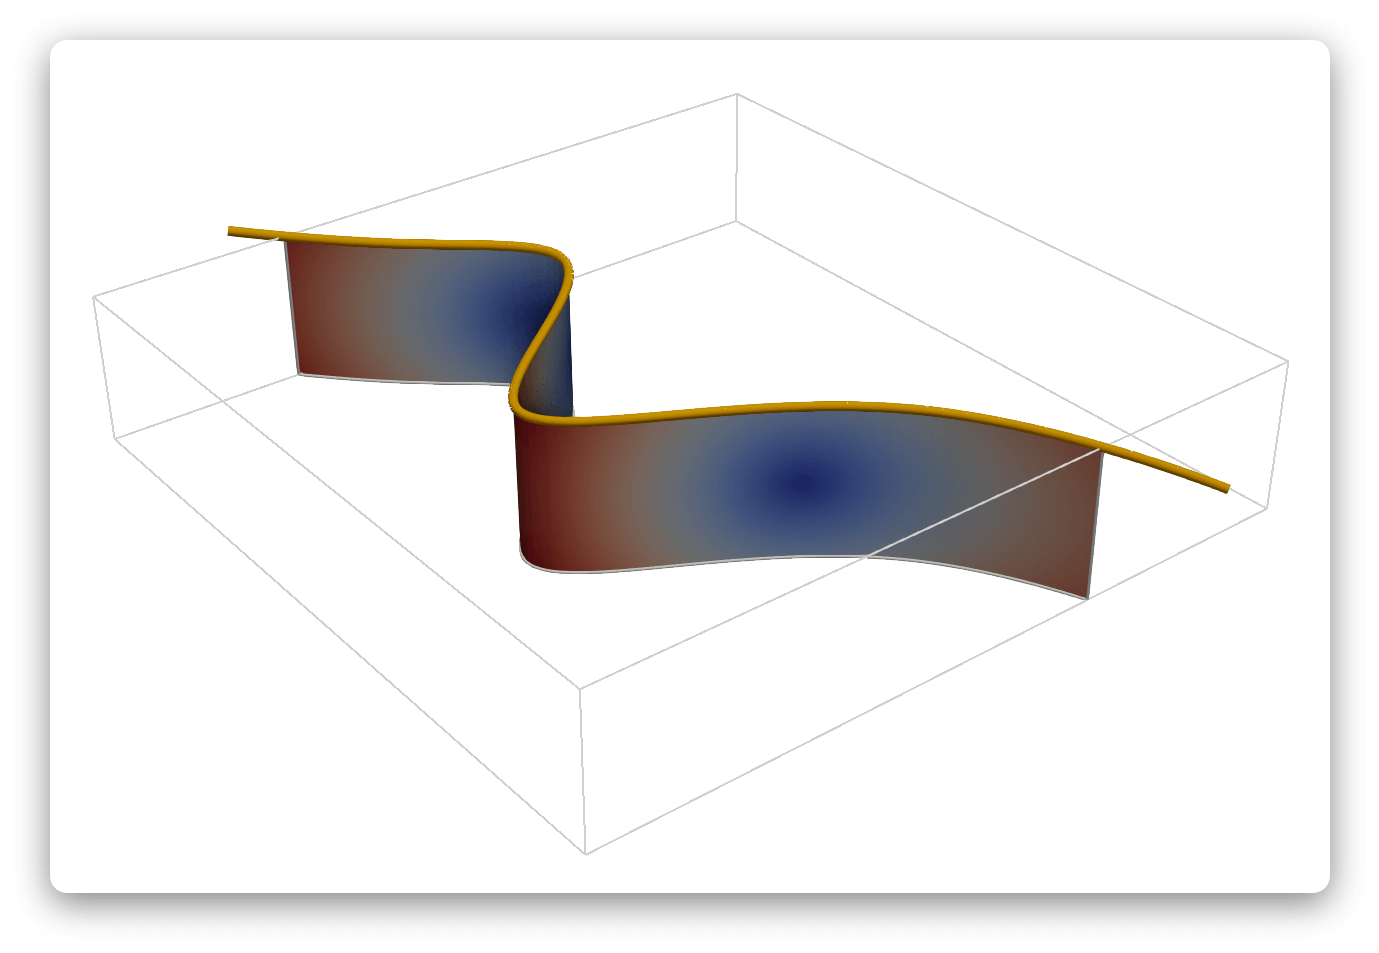
Did you know you can create a wiggly slice based on a polyline?
Well you can 👇 I’m not sure why you might need to do this, but it can be done – with the caveat that it only slices in the Z-direction.

Create a poly line source (Source > Geometric > Poly Line Source or SplineSource) - add points either by clicking or dragging them around in the window (you can type them in too if you need them to be precise).
Top Tip: Use a 2D view along the Z-axis to make things a little easier.
Add the Slice Along Polyline filter – set the Dataset to whatever you’d like to slice & set Poly Line to your wavy new source.
ParaView will extrude the polyline along the Z-axis (in both directions) & produce your lovely wiggly slice 👏
There are almost no settings to play with – just a tolerance for how closely the slice follows the polyline. The output slice is more dependent on the resolution of the polyline & the number of cells in your model though.
There’s also an option to close your spline & create tubular slices.
Other than that, remember it’s Z-axis-only so you might need to transform your model to make it work.
Clip Closed Surface
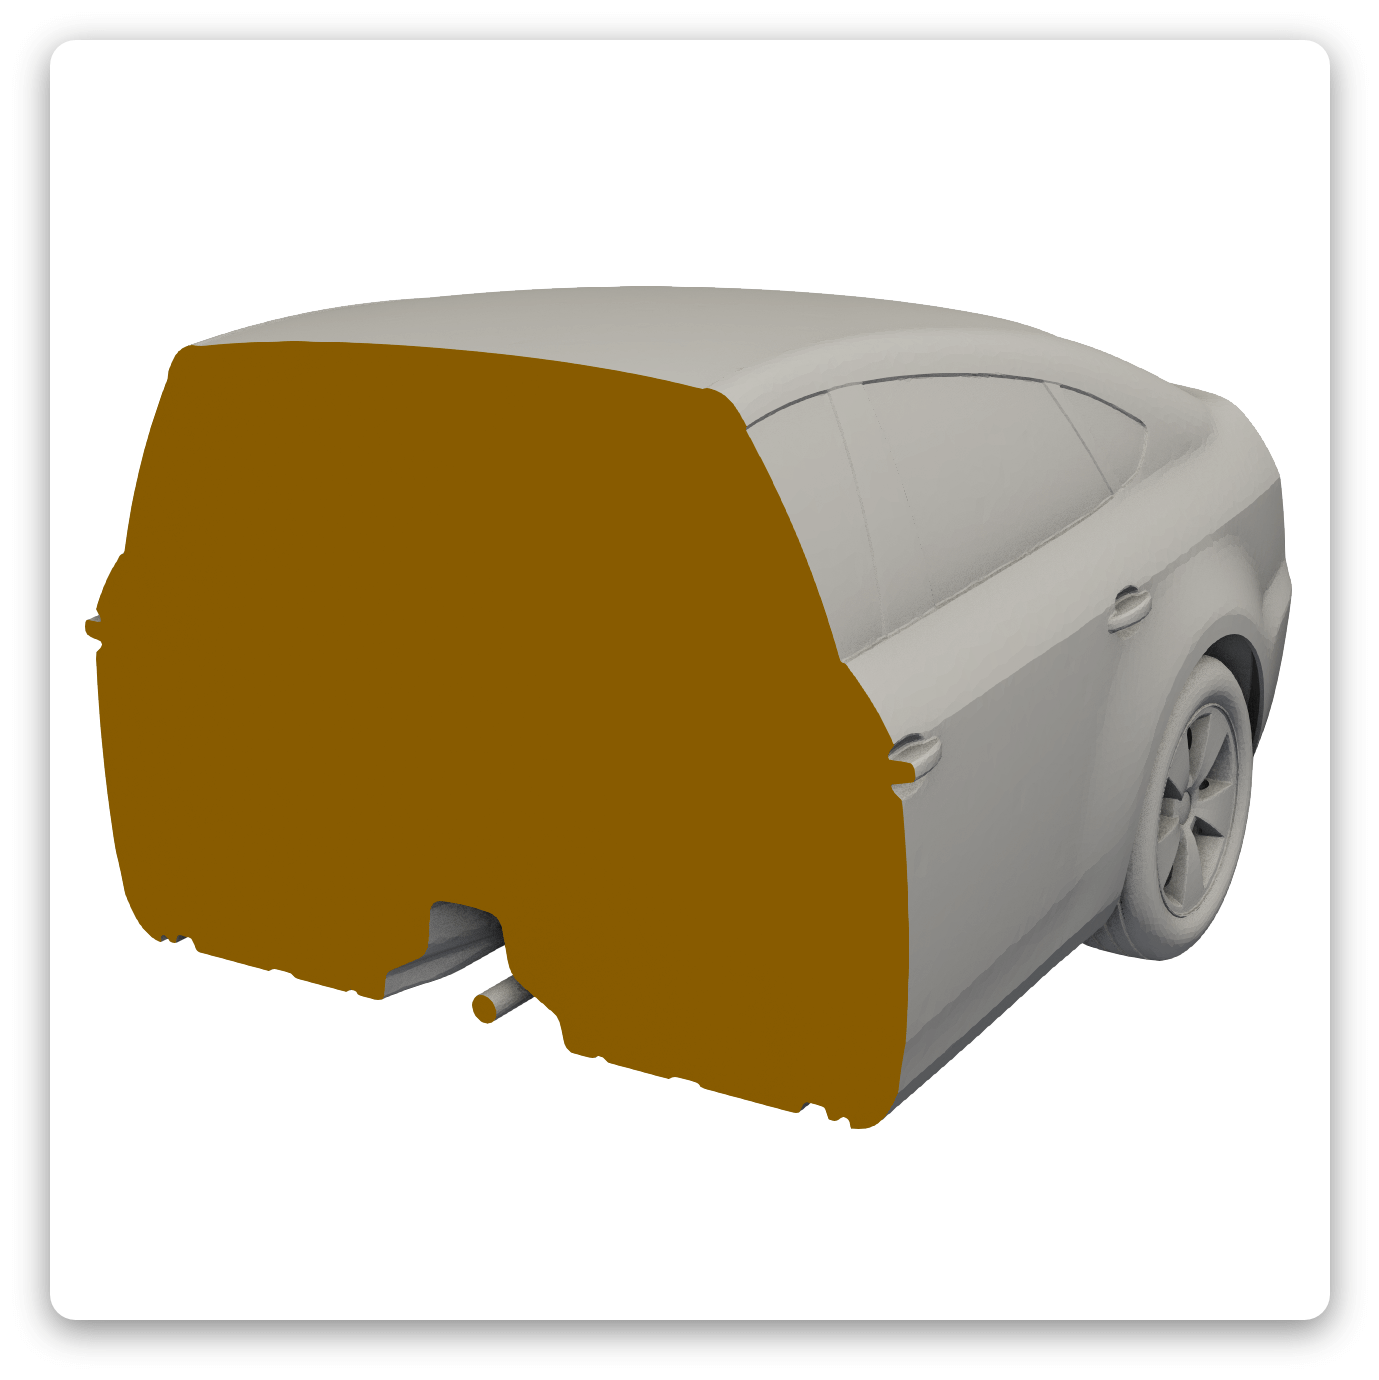
Instead of just creating an outline when you clip a surface, this filter will fill any closed loops in that outline, creating the faces that make up the cross-section.

This image is an X-normal clip through the drivAer input geometry & shows the newly-created faces in orange (this isn’t a volume mesh).
It works with any meshed surfaces as long as the slice produces closed edge-loops. The surfaces don’t have to be watertight, a mesh with holes will work, as long are you’re not trying to slice through the holes.
As with the wavy slice, there are almost no settings to play with. Position your slice plane as normal, make sure Generate Faces is ticked & you’re away. There’s an Inside Out option if it’s filling the wrong bit & the Generate Cell Origins option allows you to distinguish between the original & new surfaces (like in the above image).
I use this filter regularly, it’s great for illustrating the cross-sections of wing elements (or anything else that doesn’t ordinarily have mesh inside it).
Find Data
Find Data is a neat way to select cells/points based on (potentially) complex criteria. Grab those selected objects using Extract Selection & feed them into another part of your pipeline – a bit like Threshold, but with super-powers.
It has a handful of useful operators (is >=, is <=, is min, is max, is less than mean etc ) plus the ability to chain several of them together & create very specific selections.

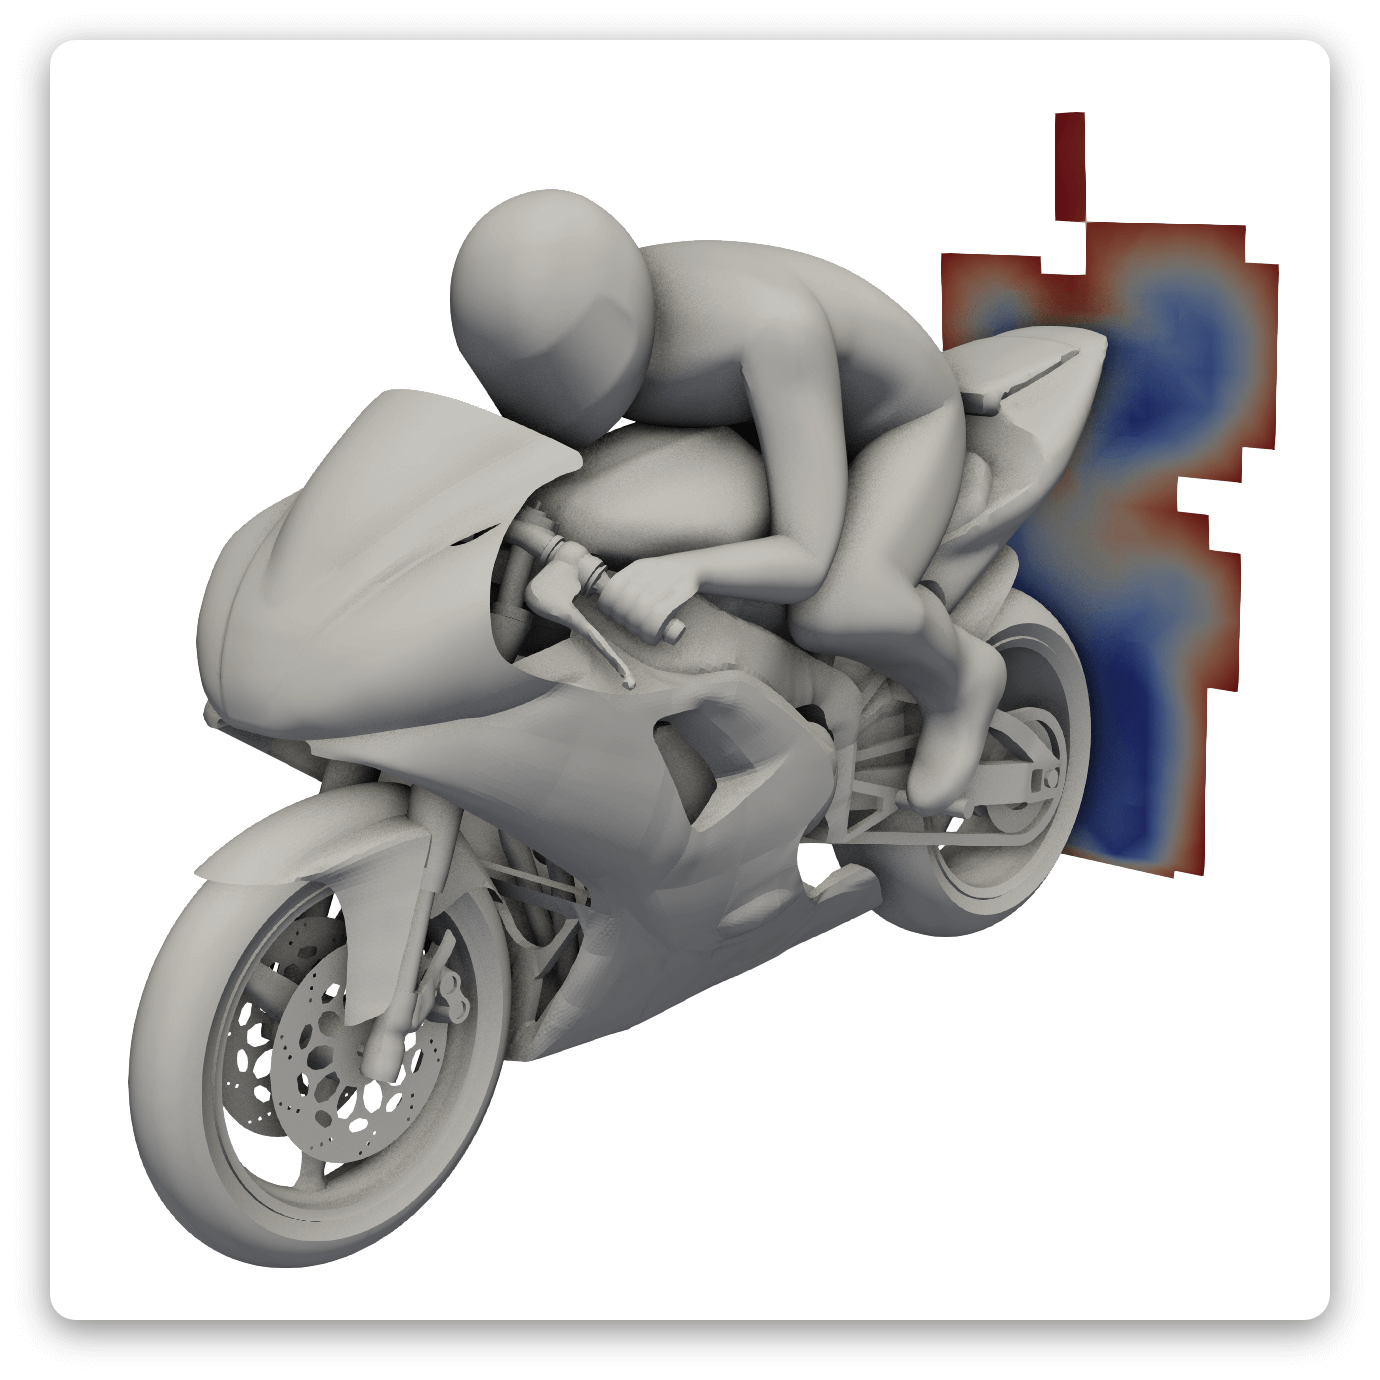
This is a super-simple example – an X-normal slice through the wake of the motorBike, from which I’ve selected (& extracted) all of the cells with velocity magnitude less than the mean.
I didn’t have to calculate the mean in advance & the selection is will change if I move the slice or update the solution – which is nice.
I could go on to use those cells as seed points for streamlines or just to illustrate that this model really needs some wake refinement 🤦♂️
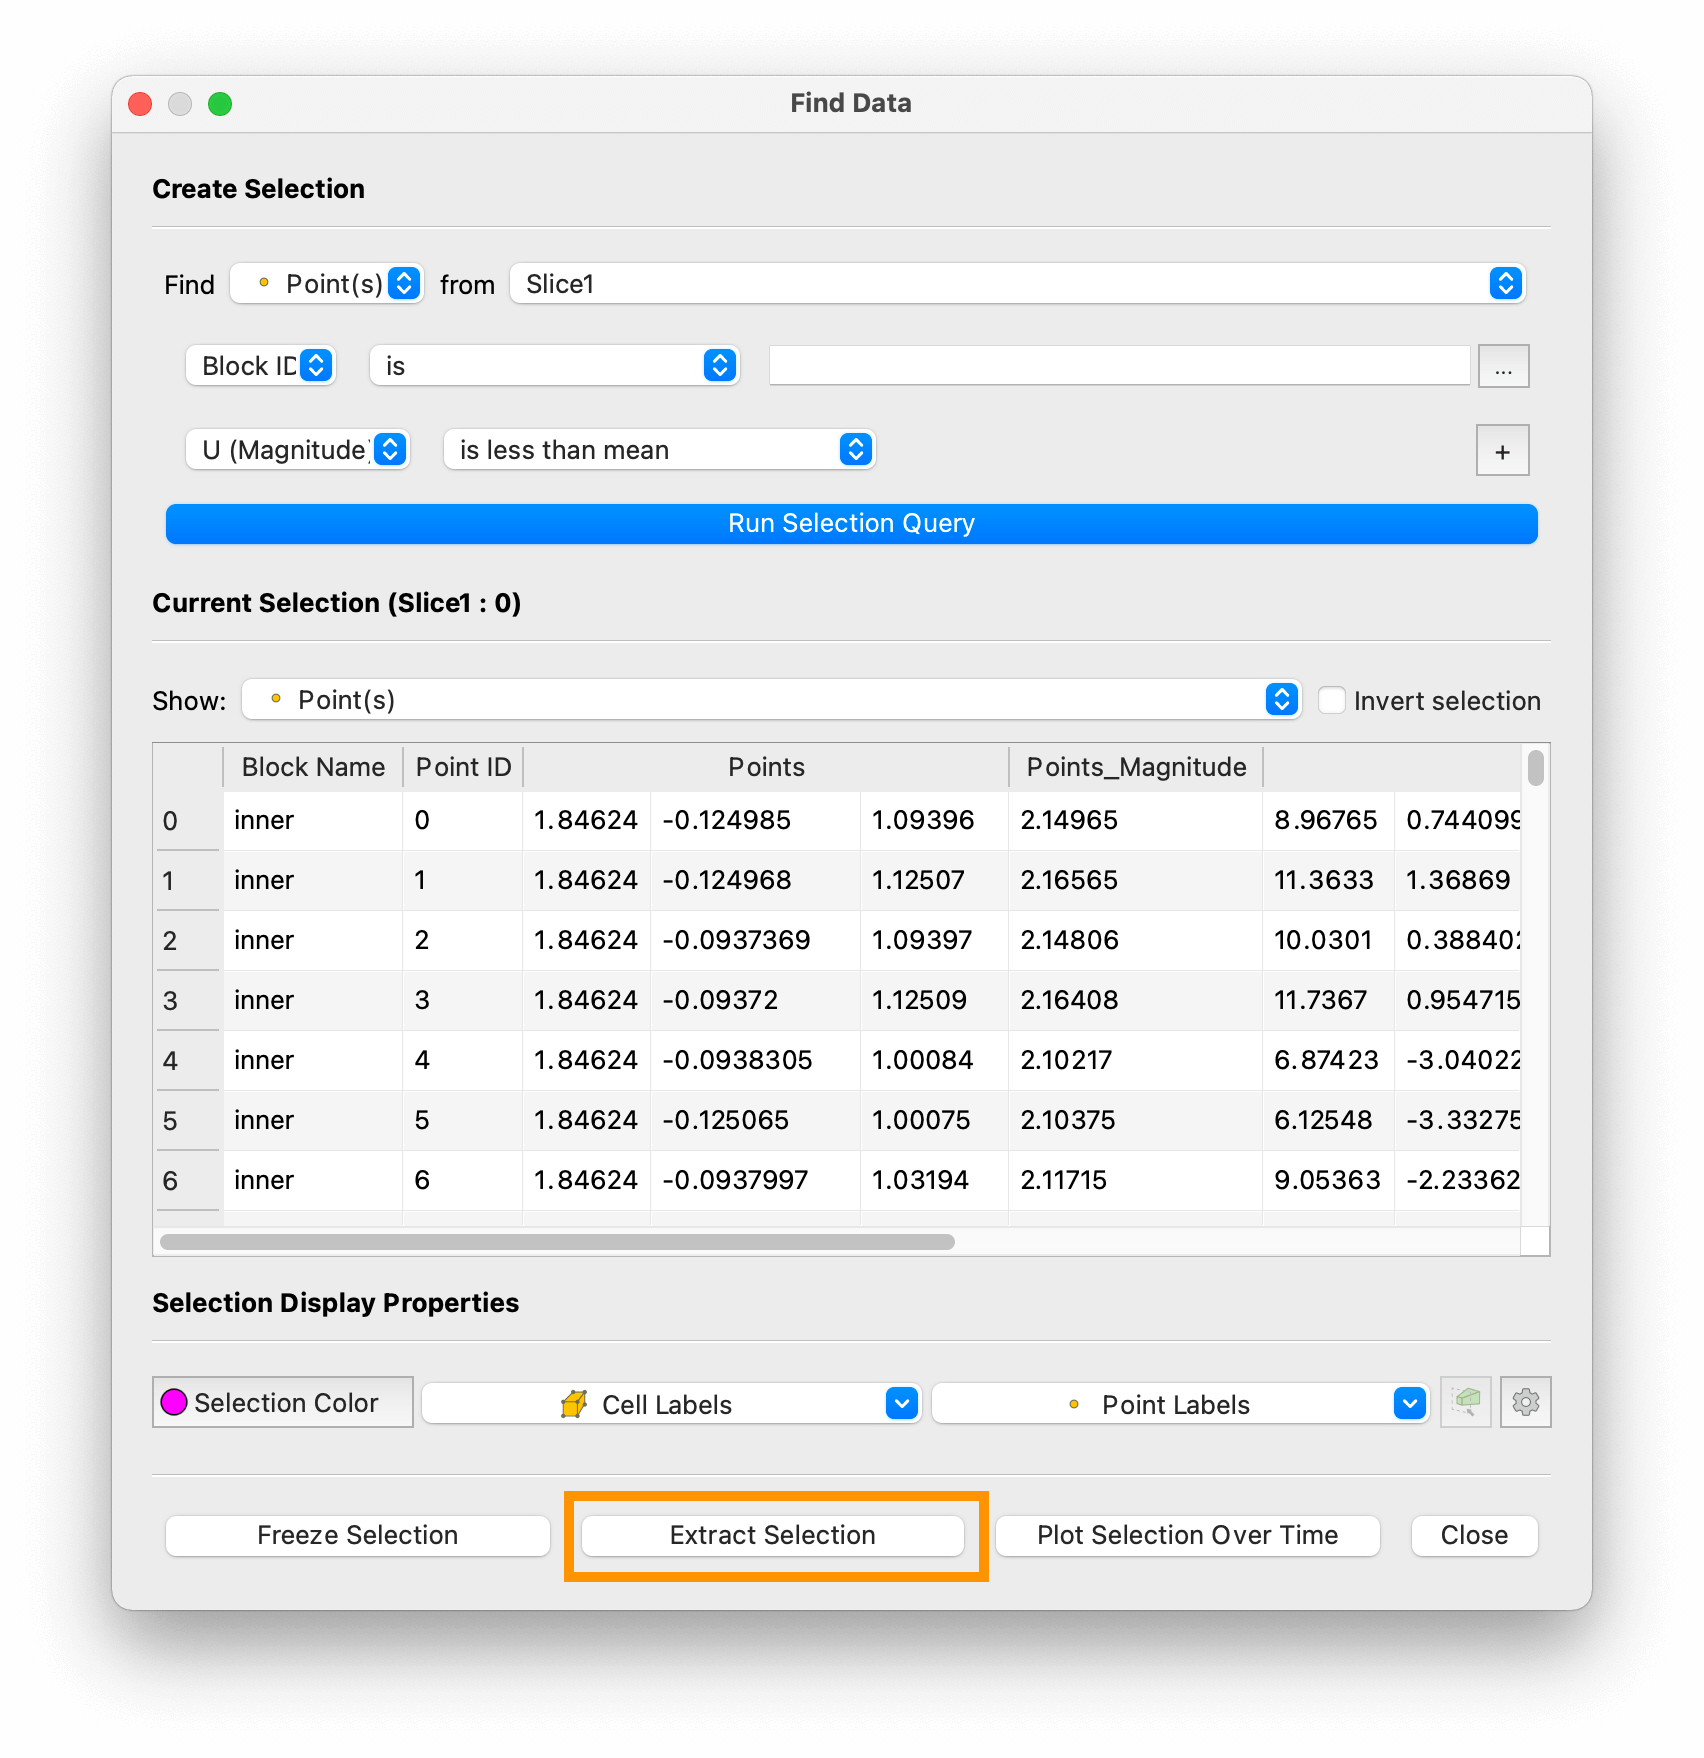
Find Data lives in the Edit menu (it also has a keyboard shortcut v ), both of which bring up this dialog:

Work through the boxes, describing what you want to select. When you click Run Selection Query the cells/points that match your criteria will be highlighted in magenta in the main view (& listed in this spreadsheet).
Once you’re happy with your chosen objects, hit the Extract Selection button (highlighted) to create a new filter in your pipeline. Now go & do something creative with your selection.
A few things to note:
- The second line of drop-downs (the one with
Block ID) seems to be optional in most cases & you can leave it alone – unless you really do want to select based onBlock ID. - If you want to tweak your selection after it’s been extracted, then make your changes in the
Find Datadialog & clickCopy Active Selectionin yourExtract Selectionfilter. It will update to reflect your changes, saving you from having to make a new version every time you want to make a change. - Clear your selection using the tiny trash can button immediately above the main display window (not sure why the selection tools have dinky buttons rather than living in the main toolbar).
I’ve found it a nice alternative to chaining multiple clips & thresholds together – more intuitive & much quicker to home in the cells you want.
Play time
There you have it – wiggly slices, surface cross-sections & fine-grained selections – three little bits of ParaView esoterica that I thought you might like. Take ’em for a spin &/or stash them away in your memory palace for another day.
I definitely recommend spending some play time in ParaView – have a poke around & see what you can find. I (re)discovered Custom Filters & Favourite Filters this week – let me know what you find.
Until next week, stay safe
