Hey there,
It’s Robin from CFD Engine & last week’s email was long, so I’ll try & keep this one snappy…
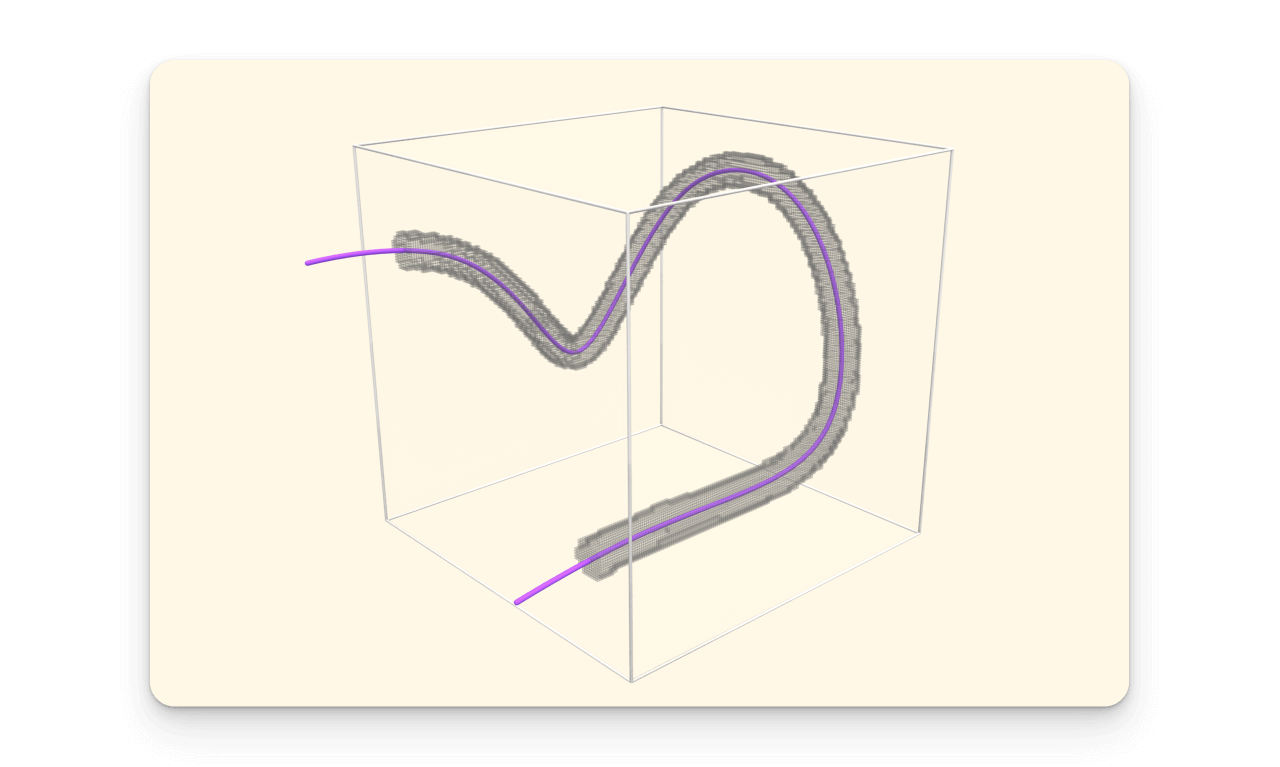
I’ve got a quick tip about using splines, lines & curves to control refinement in snappyHexMesh, giving us new flexibility to target areas that the usual methods can’t quite reach.
Let’s get to it…
Another option?
Do we need another way to add refinement in snappyHexMesh?
We can already do curvature-based refinement, we can refine feature-edges, we can even tweak edge-lengths based on a surface’s name.
We can add refinement boxes using primitives (inc. spheres, cones, cylinders etc) & we can specify refinement based on proximity to a surface. We have plenty of options.
But what about those hard to reach places where those methods don’t quite cut it?
Places where primitive-based refinement would be too complex (& inefficient) or where the target area is too off-body to be captured using surface-based methods.
Things like vortex cores, intake paths, open pipes, trailing-edges or random purple squiggles in empty boxes 👇

What’s the idea?
This is a riff on something I’ve shared before & it’s based on the notion that you can use geometry in snappyHexMesh without actually snapping to it 🤯
You already use this with refinement boxes, their surfaces don’t end up in your mesh, they just affect the volume refinement.
Well you can do the same with geometry files (OBJ, STL etc), you just need to make sure they’re not referenced in the refinementSurfaces section of your snappyHexMeshDict.
Here’s an example of how you might do it…
Refine-a-Spline
- Read an initial volume mesh into ParaView so you can easily find where to add refinement.
- Use a
Splinesource to create a curve that passes through the spots where you’d like to add some extra cells. - Thicken the
Splineusing theTubefilter (a couple of mm will do). - Export the
TubeusingFile > Save Data, select theWavefront OBJformat, accept the defaults & save it into yourconstant/triSufacefolder. - Add an entry for your new
.objin thegeometrysection of yoursnappyHexMeshDict
geometry
{
    splineTube2mm.obj
    {
        type triSurfaceMesh;
        name spline;
    }
}
- Reference your spline in the
refinementRegionssection of yoursnappyHexMeshDict(in this example we’re saying we want all the cells within 0.1m of our spline, to be level 5).
refinementRegions
{
    spline
    {
        mode distance;
        levels ((0.1 5));
    }
}
- Re-mesh & enjoy some sweet, sweet, spline-based refinement 🤩
Remember: Do not add your spline to the refinementSurfaces section, we don’t want the spline surfaces to end up in the mesh 🤦♂️
Tips
You don’t have to do this in ParaView, you could just as easily create your spline in CAD. For example, in Rhino I’d use a control-point curve & thicken it using the pipe tool, same result.
Alternatively, you could skip the spline & use a streamline as your refinement curve – just remember to thicken it using a Tube filter & save it as an .obj 👍
There’s even a method that skips the thickening step (using a searchableExtrudedCircle) but I’ll leave that for you to explore – shout if you need any pointers.
That’s about it
There you have it, spline-based refinement in snappyHexMesh, perfect for targeting hard-to-reach spots that could do with a few extra cells.
This isn’t something you’re going to need every day, but stick it in your memory palace, it’s bound to come in handy sometime 🤞
Let me know if you find this sort of thing useful or if there’s anything you think I should tackle in future emails – my inbox is always open.
Until next week, stay safe,
