Hey there 👋
It’s Robin from CFD Engine & I’ve got two ParaView tips for highlighting holes in your input geometry.
A couple of clicks that should help you spot any pesky punctures whilst you’re giving your models the once over.
Useful before you press go on a new snappyHexMesh, but also for chasing out leaks 😠
This should be a quick one, so let’s go…
A quick check
I mentioned these two in an email about leak finding, but I thought they warranted a little note of their own.
Call me paranoid but I like to take my CAD exports into ParaView before I send them off to snappHexMesh. I like to see that it’s all looking good, that I’ve not missed anything & that I’ve not clicked the wrong button while exporting.
Just a quick visual check, but I like to include these two ParaView features to increase the chances of me spotting a problem.
You’ll definitely have used the first one, but the other might be new.
Let’s start with the familiar one.
Feature Edges
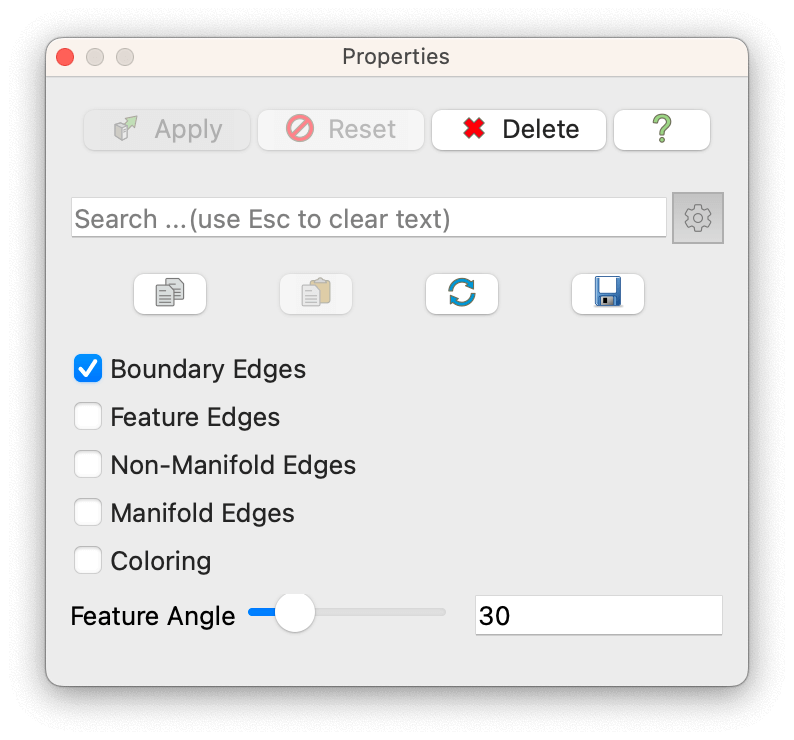
You’ve almost certainly used the Feature Edges filter in ParaView before.
You can grab boundary edges (those used by just one face), feature edges (where the angle between adjacent faces is greater than a given value), non-manifold edges (those used by more than two faces) & manifold edges (those used by exactly two faces).
For today’s use case I suggest grabbing just the boundary edges – the ones that would border a hole or indicate an open surface.

Set them to a prominent colour & give your model the once over.
Displaying these free edges on their own (i.e. with the surfaces switched off) is also a great check, as it can reveal holes that might otherwise be obscured.
snappyHexMesh isn’t worried if your model has free edges. But if you were expecting your geometry to be watertight & ParaView is showing free edges, then it’s worth a little investigation.
Backface colouring
Lots of geometry manipulation tools have the option of showing the front & back faces of your geometry in different colours. It makes it easy to check surface orientation & it also makes any holes or gaps really stand out.
ParaView is no exception, you just need to turn it on.
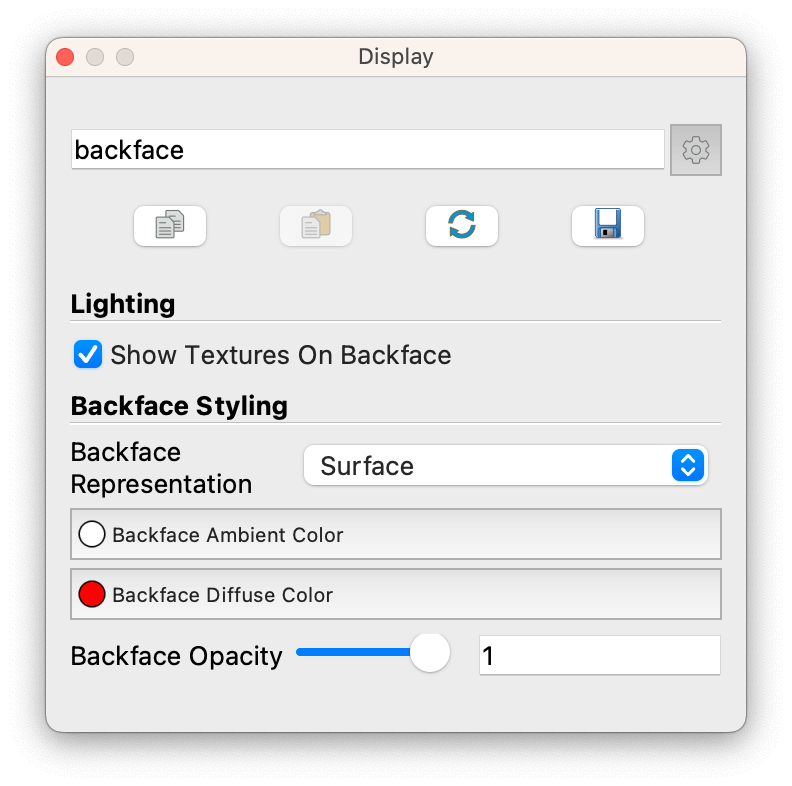
Type backface into the search box in the sidebar & you should get this…

Set the Backface Representation to Surface and change the Backface Diffuse Color to something that would stand out (red, in this case).
Again, snappyHexMesh doesn’t care too much about the orientation of your surfaces or their consistency. But if you can see inside something that you would expect to be closed, then it’s worth a bit more of a check.
Quick Example
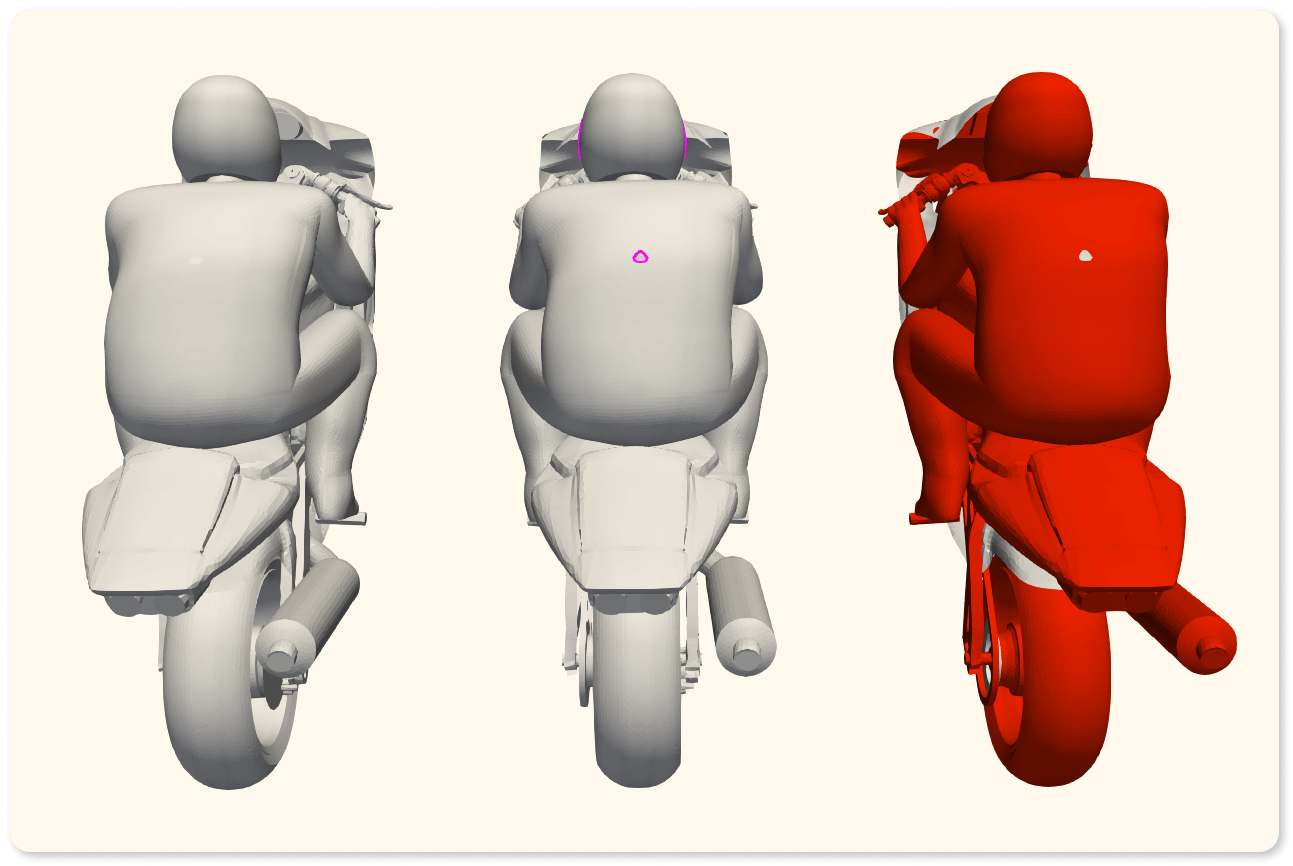
Here’s the geometry from the leak detection tutorial with these techniques applied…

The rider has a hole in their back 😬 which is clear from the purple boundary edges (centre) & with red backfaces (right) but not on its own.
Remember, we’re trying to spot problems here, there are no prizes for prettiness.
There’s nothing stopping you from combining both techniques – but I’m sure you can manage that one yourself 👍
Just checking
That’s it, two simple ParaView techniques that you can use to highlight potential geometry problems before you jump into snappyHexMesh.
Use them as part of your pre-mesh routine, or stick ’em in the toolbox for when you need to chase some leaks 🧰
Do you have any neat checks that you use to make sure your geometry’s good to go before meshing? Do you have a pre-flight checklist? Or maybe you’ve automated it?
Drop me a note, I’m always keen to hear how you do yours 🤔
Until next week, stay safe,
