Hey there 👋
It’s Robin from CFD Engine & today we’re simply sweeping steady-state slices.
Thankfully, it’s easier to do it, than say it 😛
We’re going to grab an OpenFOAM case, add a planar slice, sweep it through our volume, annotate it & save an animation (a bit like this one).
The slice movie is a post-pro classic & it’s something that every CFD pro should have in their toolbox.
So, grab yourself a coffee & let’s get slicing…
Get some data
You’ve done this before, open one of your cases in ParaView, making sure to read in the volume data, not just the surfaces.
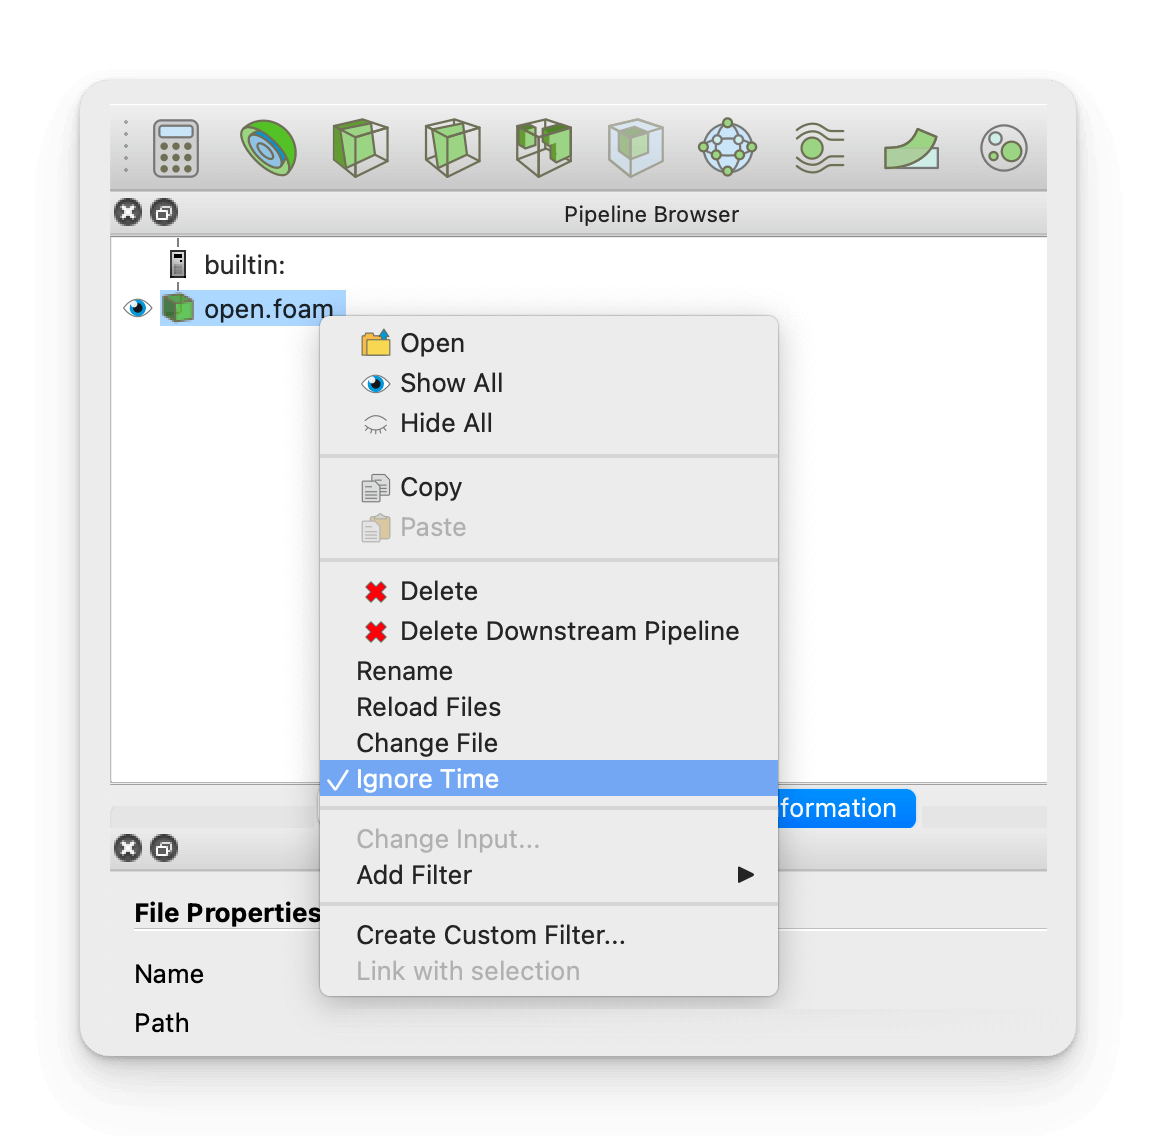
Right-click your case in the pipeline browser & select Ignore Time.
Add a slice
For the sake of simplicity, we’re going to use a planar slice & we’re going to sweep it along its normal vector.
Select your case in the pipeline browser & add a Slice filter.
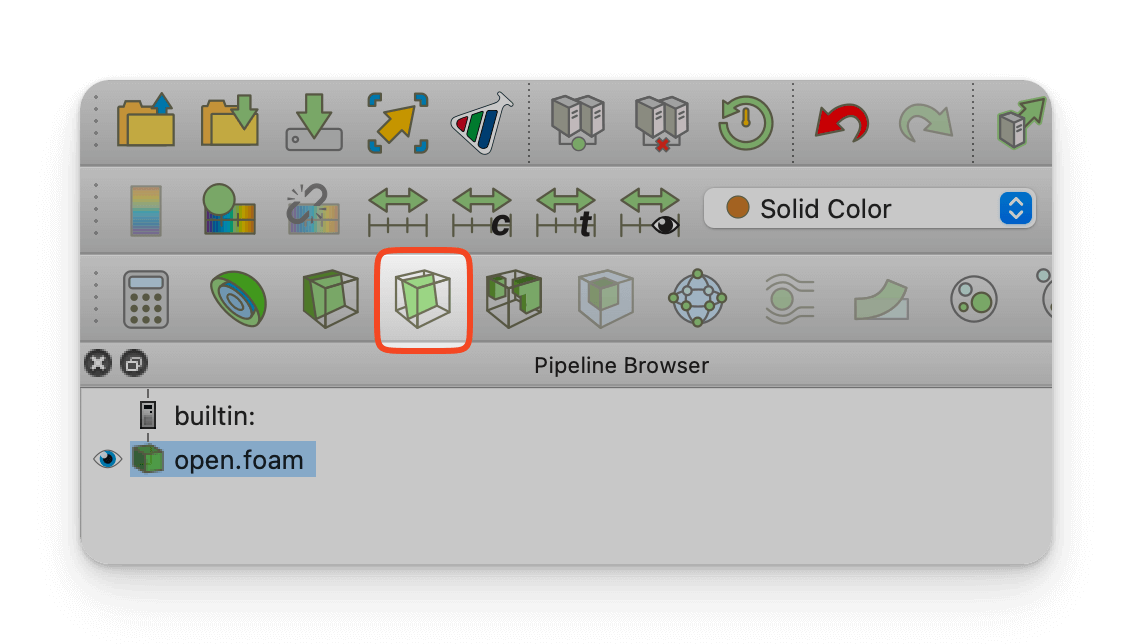
Next, we need to manoeuvre the slice into its starting position.
Set the origin & normal (it doesn’t have to be Cartesian-aligned) & click apply.
Pro Tip: Turn off the construction plane once you’re done, by un-checking
Show Plane. That way you won’t accidentally re-position the plane while trying to manipulate the view 🤦
Sweep it
This is where we define the movement of our slice, relative to its starting point, using an offset.
Switch on the Animation View (via the View menu).
It should look something like this…
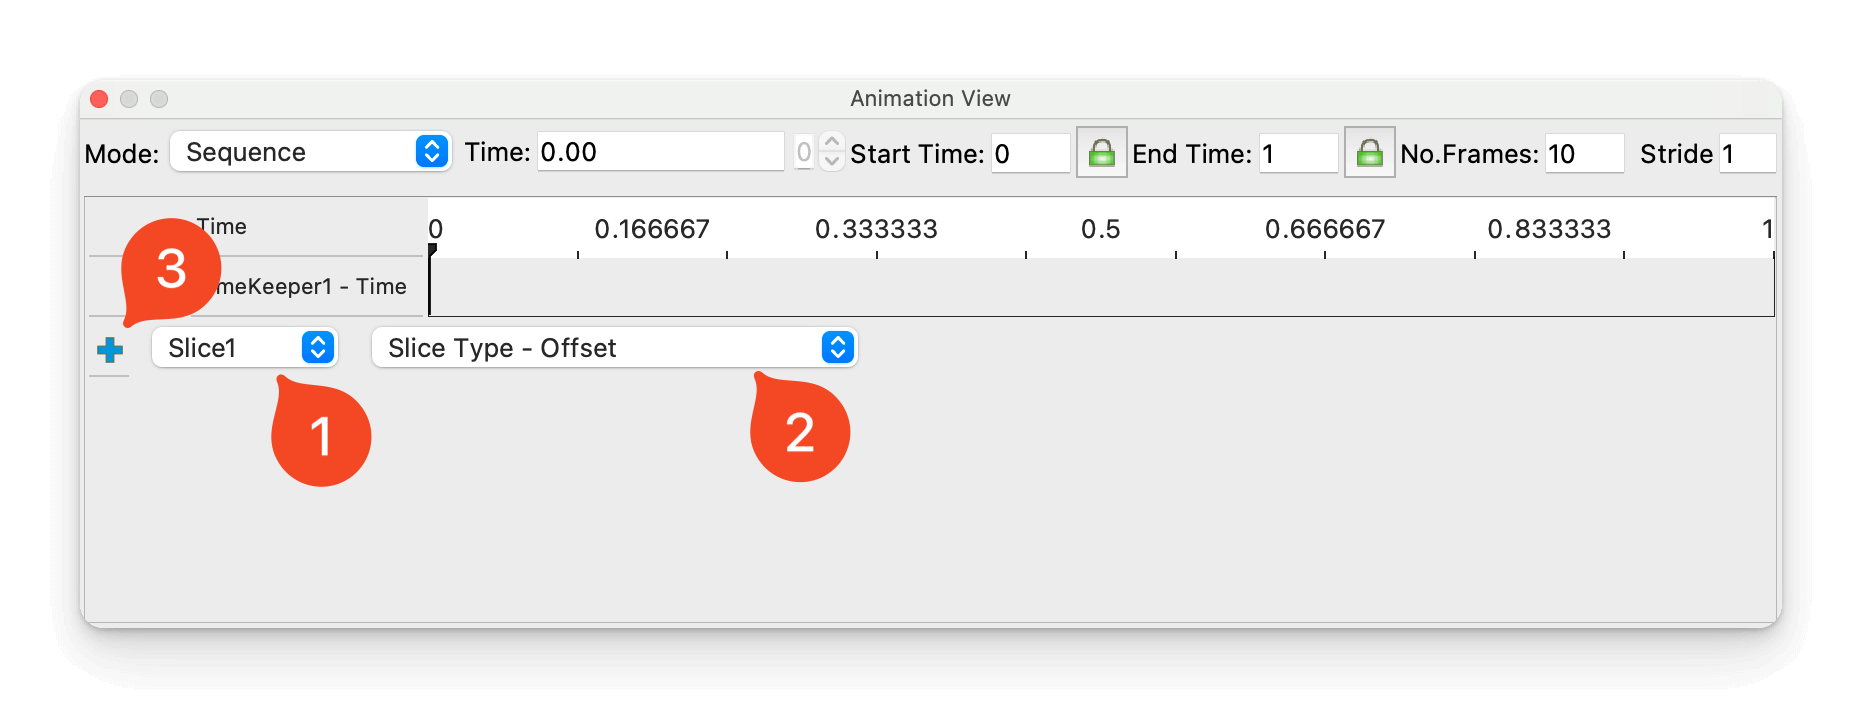
- Select your slice from the first dropdown menu;
- Choose
Slice Type - Offsetfrom the next dropdown menu; - Click the “+” button to add a new animation track.
Double-click the new animation track to bring up a menu like this…
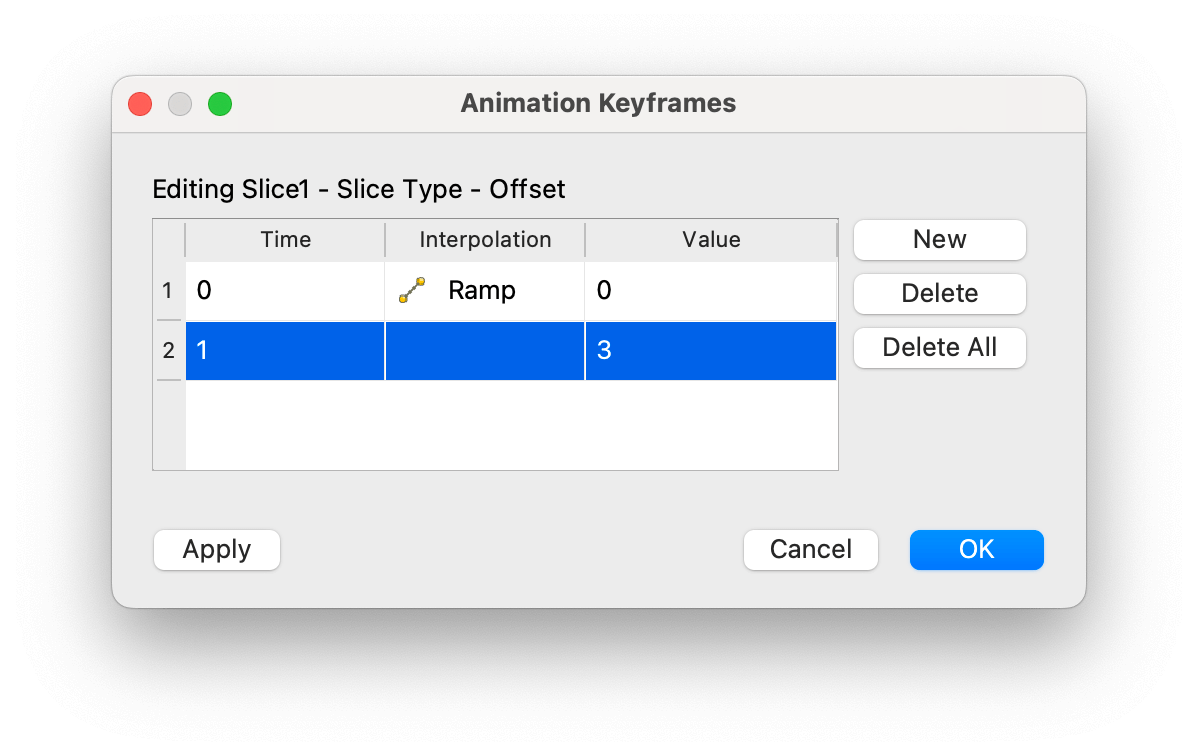
ParaView animations are based on keyframes. We only need two – a start point & an end point.
In this case, the value column refers to the amount our plane will be offset in the normal direction. We can start with a zero offset as the plane is already in position. I set the end point here to 3, as I’d like to sweep the plane 3m, set yours as you’d like.
Click OK to close this dialog & use the VCR controls to see your work 🫣

By default, animations only have 10 frames. You can adjust this at the top of the Animation View window.
Tweak the number of frames (& your offset distances) until you’re happy with the result.
Annotate it
While we’re here, let’s add an annotation to show which frame we’re looking at & to make life easier when we’re comparing multiple animations.
Select your Slice in the pipeline browser & add an Annotate Time Filter.
There are only three settings, but there are a couple of ways we can use it.
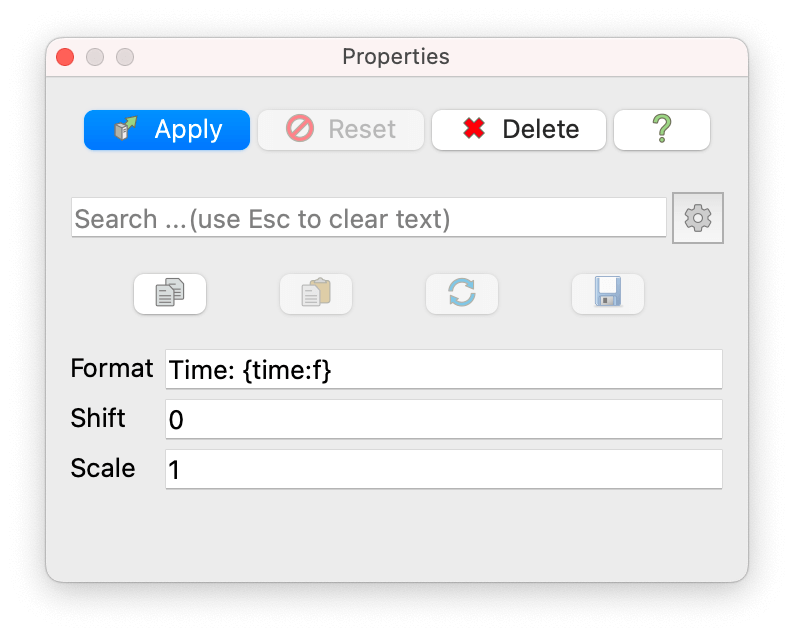
If we’re doing a Cartesian-aligned sweep, we can convert time into position & display that instead.
For example, let’s say have an X-normal slice at X=0.5m and we’re sweeping it 3m. We’d set the Shift value to 0.5, the Scale value to 3 & change the “Time:” prefix to “X-location:” (or something).
If we’re doing an off-axis sweep, then it’s not quite so easy 🤔
In that case we might want to display the frame number instead. To do that, set the Shift value to 0, set the Scale value to the number of frames - 1 & change the “Time:” prefix to “Slice Num:” (or similar).
Make it look pretty
Colour your plane by your chosen variable. Apply your favourite colourmap. Fix the range. Show & adjust the legend. Tweak your annotation. Maybe add a title via a Text source? All that good stuff.
Set the view to be perpendicular to the plane & make sure everything is in shot throughout the animation.
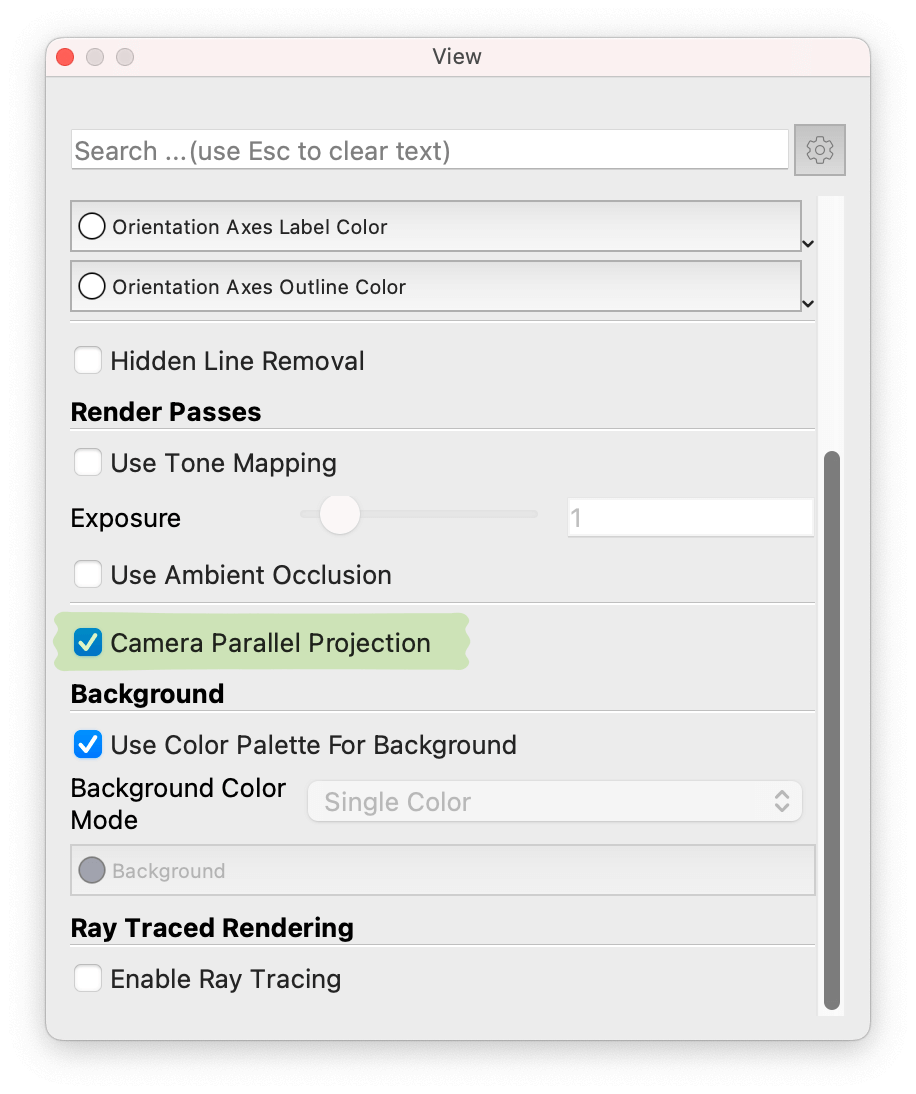
Pro Tip 01: Turn on
Camera Parallel Projectionin theViewsettings so that the plane doesn’t appear to change size as it moves.
Pro Tip 02: Turn the light kit off using the 💡 button in the toolbar (if you don’t have a 💡 button - go to
View > Toolbars > Light Controlto get it). The light kit is great for making complex surfaces look good, but it will make the colours on your plane look different to those in your legend.
Save it
Once you’re happy with how it all looks (& it plays nicely in the render window) then you can output a movie file using File > Save Animation.
Give it a name, choose a location, select your preferred format, AVI or MP4 (options vary depending on your operating system) & click OK.
In the next dialog box, the only thing you might want to change is the frame rate. You’ve already set the number of frames, so the frame rate defines the duration of your movie (100 frames at 20 frames per second, would play in 5 seconds).
Click OK & let ParaView make your movie 🎬
You’ve done a lot of work to get to this point – save a state file to capture what you’ve achieved.
Over to you
I tried (& failed) to keep this short, but hopefully it makes some sense 🤞
Try it for yourself. Click along, see what happens & let me know how you get on.
I’m confident that lots of you already know how to do this stuff, but it’s often worth a recap – I’m just thankful that you’re still reading 🙏
Until next week, stay safe,
